Creative
7-Step Guide to Real-Time Ad Creative Design Using AI-Powered Tools
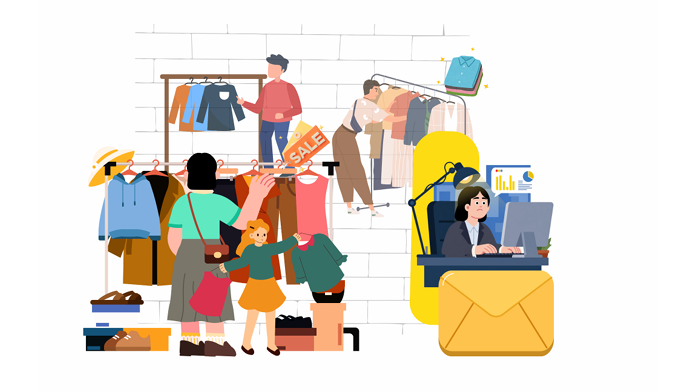
Getting a product built isn’t the hardest part. Getting it seen is.
Every small business owner knows this moment. The product is ready, but now it has to cut through the noise, reach the right audience, and do it repeatedly.
The challenge is not believing in your product. It is turning a simple product photo into a ready-to-use ad creative fast enough.
Things slow down. Design work piles up. Teams get stuck. And the momentum you worked hard to build starts to fade.
This is the real friction behind every launch, optimization, and conversion effort.
What If the Image Was Enough?
This is where the workflow shifts.
Instead of starting with layouts, templates, or complex instructions, you start with what you already have.
That single image becomes the starting point for every ad, format, and platform. - It has to tell a story instantly. - It has to feel relevant, premium, and made for the moment.
Instead of starting with layouts, templates, or complex instructions, you start with what you already have.
That single image becomes the starting point for every ad, format, and platform. - It has to tell a story instantly. - It has to feel relevant, premium, and made for the moment.
- It has to tell a story instantly.
- It has to feel relevant, premium, and made for the moment.
Below is a simple seven-step process that replaces long, traditional creative workflows with an AI-powered approach.
7 steps for creating shoot ready visuals through a raw product picture.
Step 1: Remove the Background
Begin with a clean visual base. Background noise might distract from the product and reduce visual clarity. Use background removal tools such as Remove.bg, Canva, or any AI-based background remover to isolate the product. Export the output with a white or transparent background.
This step establishes a neutral foundation for all future creative work.
This step establishes a neutral foundation for all future creative work.
%20(1920%20x%201080%20px)%20(19).png)
Step 2: Define the Creative Direction
Before generating prompts, define the intended visual context and design parameters. Consider the following:
- Background type: solid, gradient, or lifestyle environment
- Visual style: minimal, bold, premium, or playful
- Environment: studio, kitchen, outdoor, or real-world usage scenario
- Temporal context: season, festival, or specific occasion
Clear creative intent ensures consistency across generated outputs.
%20(1920%20x%201080%20px)%20(13).png)
Step 3: Generate the AI Prompt
Translate the creative direction into a structured prompt. Provide ChatGPT with:
- A proper product description
- Desired environment and mood
- Lighting, composition, and realism preferences
- Camera angle or framing (if required)
ChatGPT will generate a detailed prompt optimized for image-generation models.
%20(1920%20x%201080%20px)%20(20).png)
Step 4: Generate the AI Image
Input the prompt into an image-generation model.
Commonly used models include Nano Banana, GPT-4o, Midjourney, and Seedance AI.
Review the generated output and iterate by refining the prompt until the image appears realistic, aligned with brand guidelines, and ready for use.
Commonly used models include Nano Banana, GPT-4o, Midjourney, and Seedance AI.
Review the generated output and iterate by refining the prompt until the image appears realistic, aligned with brand guidelines, and ready for use.
%20(1920%20x%201080%20px)%20(21).png)
Step 5: Add Text Elements
Generate copy that complements the visual. Use ChatGPT to create:
- Headlines
- Sub-headlines
- Supporting copy (if required)
Text can be added either directly via the image-generation model or using a design tool such as Canva. If AI-generated text is used, verify spelling, alignment, and spacing to maintain design precision.
%20(1920%20x%201080%20px)%20(22).png)
Step 6: Add Brand Logo
Integrate the brand logo into the creative.
Use an image-generation model or a design tool to place the logo in a way that feels native to the layout.
Avoid visual dominance; logo placement should enhance recognition without distracting from the product.
Use an image-generation model or a design tool to place the logo in a way that feels native to the layout.
Avoid visual dominance; logo placement should enhance recognition without distracting from the product.
Step 7: Generate Multiple Aspect Ratios
Prepare creatives for multi-platform distribution. Generate variations in required aspect ratios, such as:
- Square (1:1)
- Vertical (4:5, 9:16)
- Horizontal (16:9)
Adjust prompts and layouts as needed to preserve visual hierarchy and consistency across formats. This may require repeating Steps 3 through 7 for optimal results.
%20(1920%20x%201080%20px)%20(23).png)
Few Frequently Asked Questions
What do I need to create a campaign-ready ad creative?
Do I need design or Photoshop skills to use this process?
Which AI image generators work best for ad creatives?
How long does it take to generate a usable ad creative?
Can I create lifestyle shots from a single product image?
How do I make sure the creative stays on-brand?
Can I generate ads for multiple platforms at once?
Is AI-generated text reliable for ad copy?
Does this replace a creative team?
Ready to Turn Product Images Into Live Campaigns?
If all you have is a product image, that is already enough. Explore the Ad Creative Studio.
All the best with your creative success!
All the best with your creative success!